Transforming Data Transformation in Java with Local Records

Data transformation is a common task for Java developers. When moving data from one location to a new one, and this could be from one datastore to another datastore, such as in a ETL batch process, or retrieving data and sending it to the presentation layer, some amount of data transformation is often required.

While not difficult, performing even simple transforms in Java often means writing a lot of code. Developers will need to create one or more classes with all the associated member fields, accessor methods, and implementing hashCode(), equals(), toString(), and so on. In this article we are going to look at how with the introduction of Records in Java 16 data transformation can be a lot easier.

Java Records

Records, after two rounds of being a preview feature in Java 14 and 15, is becoming a permanent feature in Java 16. Records are a new feature designed to address concerns relating to the definition of data carrier classes in Java including; the proper implementation of hashCode() and equals(), handling of immutable data, and the serialization, de-serialization, and initialization of data carrier classes. For this article we will be focusing how Records aims to make the definition of a data carrier class more concise.

First, let’s understand the issues with defining a data carrier class in Java before Java 16. Before Records, creating a data carrier class would commonly look something like this:

public class Person {

	private long id;
	private String firstName;
	private String lastName;

	public Person() {
	}

	public Person(long id, String firstName, String lastName) {
		this.id = id;
		this.firstName = firstName;
		this.lastName = lastName;
	}

	public long getId() {
		return id;
	}

	public String getFirstName() {
		return firstName;
	}

	public String getLastName() {
		return lastName;
	}

	public void setId(long id) {
		this.id = id;
	}

	public void setFirstName(String firstName) {
		this.firstName = firstName;
	}

	public void setLastName(String lastName) {
		this.lastName = lastName;
	}

	@Override
	public int hashCode() {
		final int prime = 31;
		int result = 1;
		result = prime * result + ((firstName == null) ? 0 : firstName.hashCode());
		result = prime * result + (int) (id ^ (id >>> 32));
		result = prime * result + ((lastName == null) ? 0 : lastName.hashCode());
		return result;
	}

	@Override
	public boolean equals(Object obj) {
		if (this == obj)
			return true;
		if (obj == null)
			return false;
		if (getClass() != obj.getClass())
			return false;
		Person other = (Person) obj;
		if (firstName == null) {
			if (other.firstName != null)
				return false;
		} else if (!firstName.equals(other.firstName))
			return false;
		if (id != other.id)
			return false;
		if (lastName == null) {
			if (other.lastName != null)
				return false;
		} else if (!lastName.equals(other.lastName))
			return false;
		return true;
	}

	@Override
	public String toString() {
		return "Person [id=" + id + ", firstName=" + firstName + ", lastName=" + lastName + "]";
	}

}

Despite the only business meaningful part of the code being the three member fields; id, firstName, lastName, it would take nearly 80 lines to define the class so it could be properly used in a Java application (which would often requires being compatible with popular frameworks). With Records, the above can instead be declared in a single line:

public record Person(long id, String firstName, String lastName){}

Note: Records are shallowly immutable, which is a bit different from how many data carriers are currently defined in Java projects, like the initial Person example, which typically Getters and Setters to be compatible with frameworks. Frameworks are being updated to be compatible with Java 16, and thus Records, and you can view their status here: https://wiki.openjdk.java.net/display/quality/Quality+Outreach.

Then when the above code is run through the Java compiler the below is produced:

public final class com.bk.example.Person extends java.lang.Record {
  private final long id;
  private final java.lang.String firstName;
  private final java.lang.String lastName;
  public com.bk.example.Person(long, java.lang.String, java.lang.String);
  public final java.lang.String toString();
  public final int hashCode();
  public final boolean equals(java.lang.Object);
  public long id();
  public java.lang.String firstName();
  public java.lang.String lastName();
}

The benefits of being able to define a data carrier class in a line or two of code, what would previously had taken dozens of lines of code are pretty straightforward. Though there are a number of other benefits Records provide, which if you would want to learn more about, I would highly recommend these two episodes of the podcast Inside Java; “Record Classes” with Gavin Bierman and “Records Serialization” with Julia Boes and Chris Hegarty.

Note: If you are wondering why the compiled code doesn’t have “Getters” and “Setters”, nomenclature that comes from the JavaBeans standard, be sure to read this article that covers some of the design considerations around Records.

Local Records

Like a normal Java class, a Java Record can also be defined with in the body of a method. However, whereas defining a data carrier class within a method body was often impractical due to impacts on the readability of code, Records impose no such liability. Let’s see how Records can be leveraged to make light data transformation easier.

In this simple code example I am printing to console a list of Persons I am retrieving from a repository:

public class PersonService {

	private PersonRepo repo = new PersonRepo();

	public void printPersons() {
		repo.getAllPersons().stream().forEach(p -> System.out.println(p.toString()));
	}
}

The above code when executed would print out the following:

Person[id=1, firstName=Tony, lastName=Stark]
Person[id=2, firstName=Bruce, lastName=Banner]
Person[id=3, firstName=Sam, lastName=Wilson]
Person[id=4, firstName=Monica, lastName=Rambeau]
Person[id=5, firstName=Wanda, lastName=Maximoff]

When presenting information to users it’s often not desirable to include meta information like id. Users typically wouldn’t be interested in such information and I might want to keep such information private for reasons from security to having more flexibility when changing metadata values.

With Records I can easily define a new data carrier class in the body of printPersons() that can handle the light transformation of stripping out the id field like seen here:

public void printPersons() {
	record PersonView(String firstName, String lastName) {}
	repo.getAllPersons().stream().map(p -> new PersonView(p.firstName(), p.lastName())).forEach(pv -> System.out.println(pv.toString()));
}

Running the above code will produce the following output:

PersonView[firstName=Tony, lastName=Stark]
PersonView[firstName=Bruce, lastName=Banner]
PersonView[firstName=Sam, lastName=Wilson]
PersonView[firstName=Monica, lastName=Rambeau]
PersonView[firstName=Wanda, lastName=Maximoff]

This is good, but sometimes during data transformations there might be some additional behavior we need to have happen, beyond the simple moving around or stripping out of fields. Luckily the default behavior of a Records class can also be easily overwritten. If for example I wanted to provide even cleaner output, I can simply override the default toString() method with my own, like in this example:

public void printPersons() {
	record PersonView(String firstName, String lastName) {
		@Override
		public String toString(){
			return firstName + " " + lastName;
		}
	}
	repo.getAllPersons().stream().map(p -> new PersonView(p.firstName(), p.lastName())).forEach(pv -> System.out.println(pv.toString()));
}

Which prints this to console:

Tony Stark
Bruce Banner
Sam Wilson
Monica Rambeau
Wanda Maximoff

Records allow for plenty of flexibility, equals(), hashcode(), and the accessor methods of a Record class can all be overwritten if needed. Custom behavior can also be added to the constructor, such as checking for null values, though the Java compiler will ensure all member fields of a Record are being assigned a value, and if not, add an assignment operation automatically. Custom methods can also be added if needed as well. For example a toJson() method could be defined for formatting the contents of a Record as a JSON message.

Conclusion

Java 16 is scheduled to go GA March 16th and with it fully bring Records to the Java ecosystem. In this article we saw how Records will provide some significant ergonomic benefits to Java developers when performing the common task of transforming data.

If you would like to check out Java Records for yourself, along with the other new features coming in Java 16, you can download the Java 16 JDK here: https://jdk.java.net/16/.

You can find the example code used in for this article along with instructions on how to run it on my github profile: https://github.com/wkorando/transformation-with-java-local-records

Capturing Desktop and Zoom Audio in OBS on macOS

Because of the COVID-19 pandemic, many in person events like meetups and conferences have gone digital. We have done that with the Kansas City Java Users Group I help organize, I have also seen similar trends from fellow user group and event organizers.

In the push to go digital, many have turned to two popular tools; OBS and Zoom for handling livestreams. For macOS users it is surprisingly difficult to capture desktop and zoom audio. This article is a step-by-step guide for capturing desktop audio and also audio from a zoom call in OBS.

Prerequisites and Priors

This article assumes you have OBS and Zoom already installed on your system. Additionally I have asked some colleagues to run through these steps, and they have done so successfully, but their computers and mine are setup similarly to this:

System-Setup

Capturing Desktop Audio on macOS

For reasons, capturing desktop audio isn’t an intrinsic feature in macOS, so you will need to download a third party tool to do this. I’m following the advice from this YouTube video. So here are the steps.

  1. Install IShowUAudio, you should be presented on a screen that looks like below, for macOS Mojave, or later click the button to the right and click the download button on the following page.  IShowUAUdio download
  2. When installing IShowU Audio you will need to give IShowU Audio permissions (read below if you are not prompted during install):permissions-2permissions-1
    Note: If you are not prompted during install, then hit “command + space” to bring up spotlight and search for “Security & Privacy”, you should see an image similar to the above.
    For more info check Shinywhitebox’s documentation here.
  3. Once the installation is complete, restart your computer

Configuring Output Device

With IShowUAudio installed, the next step is to configure an audio device. This will allow us to capture desktop audio, while also hearing that audio as well.

  1. Hit command + space to bring up the system spotlight and search for “Audio MIDI”audioMidi
  2. Click the little “+” in the bottom left hand corner of the dialog box and select “Create Multi-Output Device”multioutput-part1
  3. You will be presented with another dialog box that looks something like below, note the arrows and run through the steps after the picturemultioutput-part2
    1. Click the “master device” dropdown in the top center of the dialog and select “iShowU Audio Capture”
    2. Select “iShowU Audio Capture” as one of the audio devices
    3. Select any other appropriate output devices from this list for your setup, they will be your “pass through” so you can hear what OBS is capturing.
      Note: If you are planning on using a bluetooth headset and you are planning on using its built in microphone read the “known problems” section

      1. Uncheck “Drift Correction” for all devices if selected
      2. (Optional) Click on the “Multi-Output Device” label in the device’s list on the left hand side of the dialog box and give it something more memorable I used: OBS Audio Capture
  4. Once you have run through the above steps your screen should look something like this:multioutput-part3
  5. Hit “command + space” to bring up spotlight and search for “Sound”
  6. Click “Output”
  7. Select the Multi-Output Device we just created (i.e. “OBS Audio Capture”):mac Sound

Configure OBS to Capture Desktop Audio

We will now need to go into OBS to configure it to use the audio device we just setup to capture audio. With OBS open run through the following steps:

  1. Click on “Settings” in the lower left hand side of the screenOBS Setup - part 1
  2. Click on Audio in the dialog pop-upOBS setup - part 2
  3. Click on the dropdown for Mic/Auxiliary Audio 2 (or some other free option) and selection “IShowU Audio Capture”OBS setup - part 3
  4. Click the “+” button under sources for a sceneOBS Setup - part 4
  5. Select “Audio Input Capture”
    OBS Setup - part 5
  6. Give a descriptive name for the audio source (e.g. “Desktop Audio”)
    OBS Setup - part 6
  7. Select “iShowU Audio” as the deviceOBS Setup - part 7
  8. You should now be capturing desktop audio, try playing a video or music to make sure sound is being captured (the sound bar should move)
    Note: See below if you are not hearing any sound, if nothing is being captured run through the previous two sections again to make sure you did everything rightOBS Setup - part 8

Configure Zoom to Allow OBS to Capture Its Audio

You will need to do a couple of steps to capture audio from a zoom call. If you haven’t already start Zoom.

  1. Make sure Zoom is your active program and open it’s preferences, top left of the desktop
    Zoom Setup - Part 1
  2. Select audio on the right side of the dialog boxZoom Setup - Part 2
  3. Open the speaker dialog box and select the multi-output device created earlier (e.g. OBS Audio Capture)Zoom Setup - Part 3
  4. Click “Test Speaker” and verify in OBS that audio is being captured

Known Problems

Below are some common problems/issues I have ran into:

  • OBS is capturing audio, but I’m not hearing anything – If OBS is capturing audio, but you can’t hear anything coming from your computer one of a few things could be an issue
    1. Make sure the “pass through” audio device you configured during the “multi-output device” section is what you are using to listen to audio
    2. Make sure your computer output is going to the “multi-output device” you setup earlier (command + space and search for sound and select output)
  • My computer audio is messed when not using OBS – When not using OBS, you probably want to use a different audio setup, e.g. using your computer’s speakers. Open up Sound in system preferences (Command + space) and under “output” select the preferred device for output
  • Bluetooth headsets – Using the integrated microphone on bluetooth headsets seems to create a feedback loop. This won’t affect the audio being captured by OBS, but is distracting/disorientating. 

Conclusion

Livestreaming is a new world for many as we deal with the ramifications of quarantines and social distancing brought on in response to COVID-19. Hopefully this guide addresses an issue I quickly ran into when trying to use OBS on macOS. Please leave a comment or reach out to me on twitter if you have any questions or feedback about this article.

Sources for configure IShowU Audio & Multi-Output Device: https://www.youtube.com/watch?v=y5O6ypLAH88


I Wasted Days Because I Refused to Ask for Help

This week I have been working on a how-to article providing the step-by-step of building a Spring Boot starter. After reading through the documentation on the subject, I decided to start to put together my code example. A simple example of creating a starter to handle security configuration within an organization. Below is a live shot of me struggling with Spring Boot’s auto-configuration:

Person struggling to climb over fence instead of opening a gate

Like many developers, struggling with technology isn’t exactly an uncommon event as here is another occurrence from only last month:

After pounding my head on this auto-configuration issue, looking at the documentation, looking at other code examples, I eventually realized I needed help, so I “phoned a friend”:  Screen Shot 2019-12-19 at 8.42.07 AM

If you look at the timestamps, within a minute my colleague Ozzy Osbourne, yes that’s his real name, provided me with my answer. Like is so often the case, the problem was a trivial syntax issue, I incorrectly named a file spring.fractories instead of spring.factories.

Scope the Problem and Find an Expert

person saying they are an expert
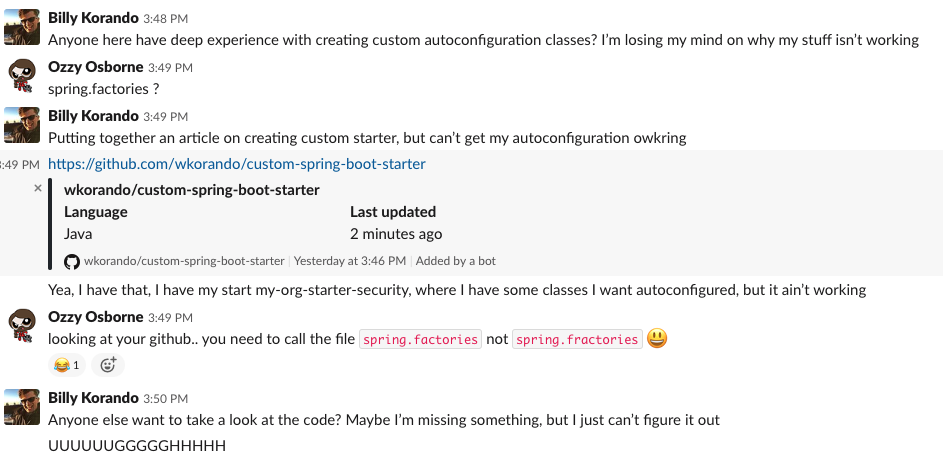
Asking for help is important, but there are better and worse ways of asking for it. In my case when I asked for help, I went to a slack channel devoted to Spring experts. I also knew the problem was with auto configuration. This gave my colleagues the information they needed to know where to look in my code. I scoped the problem, and turned to the people who knew the area well, leading to its rapid resolution.

Because IBM is a huge organization, I am fortunate in having many experts to turn to when I have a question. This is very different from my previous experience; most organizations I have worked at have numbered, in total, in the hundreds or low thousands, with the technical staff only a subset of that. If you work at a smaller organization where the number of “experts” you can turn to is limited I would recommend engaging in your local meetups to expand your network. I have gotten to many developers in my area, Kansas City, this way, which I have turned to for help on more than a few occasions.

Note: If you are a Java developer in the Kansas City area be sure to check out the Kansas City JUG.

Regardless when asking for helping either inside or outside of your organization you should be conscientious of those you are asking for help from. Everyone has their own priorities, so it’s important to scope a problem down as much as reasonably possible and also provide useful background information. This helps you as you don’t have to spend time re-treading tried solutions or chasing down red-herrings.

Pay it Forward

Humans operate on concepts of trust, reciprocity, and mutual respect. As you ask for help, it’s important to be mindful that you are asking someone else to take time out of their day to help you with something. When you scope a problem before asking for help, it shows a sign of respect to who you asked for help that you made a real attempt to resolve the issue yourself first (i.e. you value their time).

As you ask for help, you should also be attentive to others when they need help. I may not be in a position soon to repay my colleague directly by helping him with an issue, but I can still repay some of that goodwill by helping the next person who might ask a question in the Spring experts channel, or some other area I have expertise in.

Conclusion

Most of all what I hope you take from this article is it is ok to ask for help. Like many developers early in my career I was at times overly cautious about asking for help. I was afraid that by asking questions I might be revealing my ignorance and/or that I didn’t know what I was doing (see: imposter syndrome). It is something that every developer needs to works to get over. Even after a dozen years as a professional developer I still have been tripped up by a simple spelling mistake that cost me hours. Next time you find yourself spinning your wheels, scope the problem and find an expert.