Because of the COVID-19 pandemic, many in person events like meetups and conferences have gone digital. We have done that with the Kansas City Java Users Group I help organize, I have also seen similar trends from fellow user group and event organizers.
In the push to go digital, many have turned to two popular tools; OBS and Zoom for handling livestreams. For macOS users it is surprisingly difficult to capture desktop and zoom audio. This article is a step-by-step guide for capturing desktop audio and also audio from a zoom call in OBS. 
Prerequisites and Priors
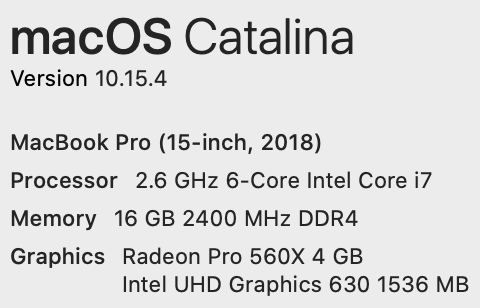
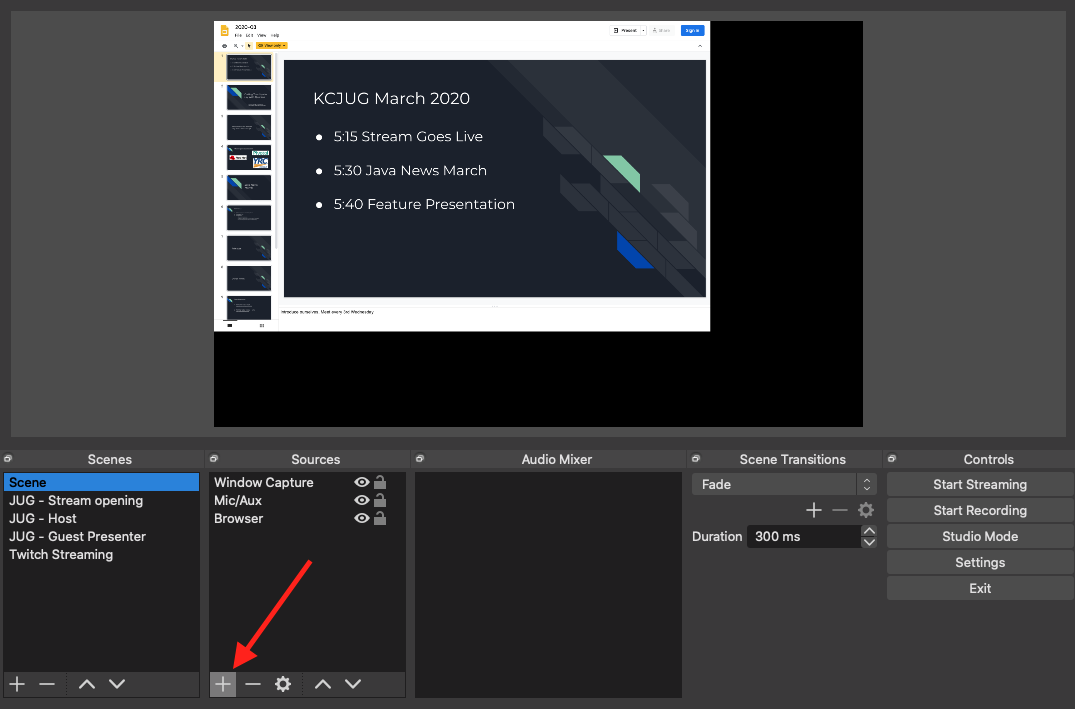
This article assumes you have OBS and Zoom already installed on your system. Additionally I have asked some colleagues to run through these steps, and they have done so successfully, but their computers and mine are setup similarly to this:
Capturing Desktop Audio on macOS
For reasons, capturing desktop audio isn’t an intrinsic feature in macOS, so you will need to download a third party tool to do this. I’m following the advice from this YouTube video. So here are the steps.
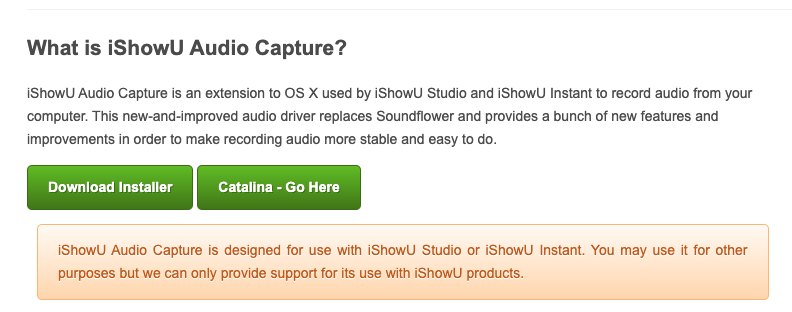
- Install IShowUAudio, you should be presented on a screen that looks like below, for macOS Mojave, or later click the button to the right and click the download button on the following page.
- When installing IShowU Audio you will need to give IShowU Audio permissions (read below if you are not prompted during install):
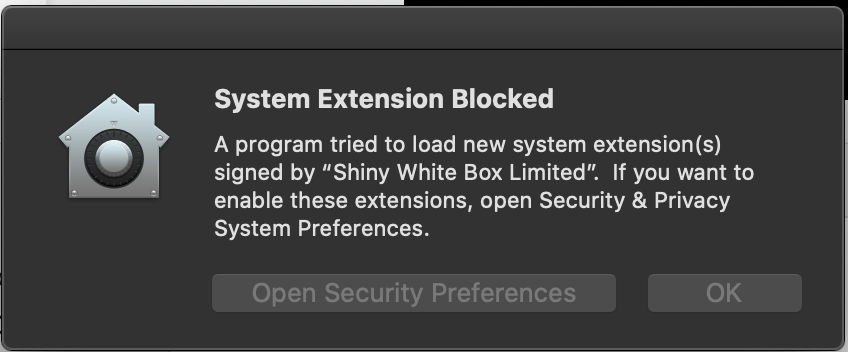
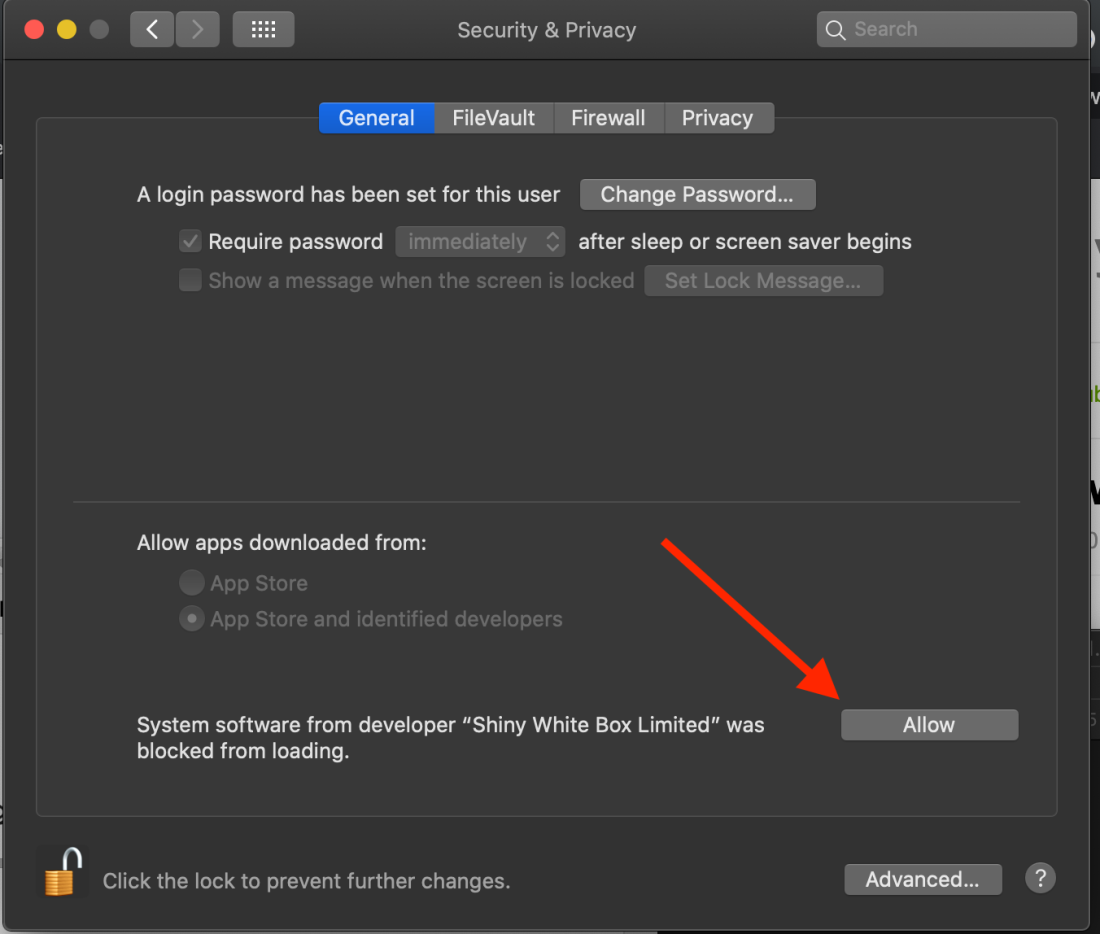
Note: If you are not prompted during install, then hit “command + space” to bring up spotlight and search for “Security & Privacy”, you should see an image similar to the above.
For more info check Shinywhitebox’s documentation here. - Once the installation is complete, restart your computer
Configuring Output Device
With IShowUAudio installed, the next step is to configure an audio device. This will allow us to capture desktop audio, while also hearing that audio as well.
- Hit command + space to bring up the system spotlight and search for “Audio MIDI”

- Click the little “+” in the bottom left hand corner of the dialog box and select “Create Multi-Output Device”
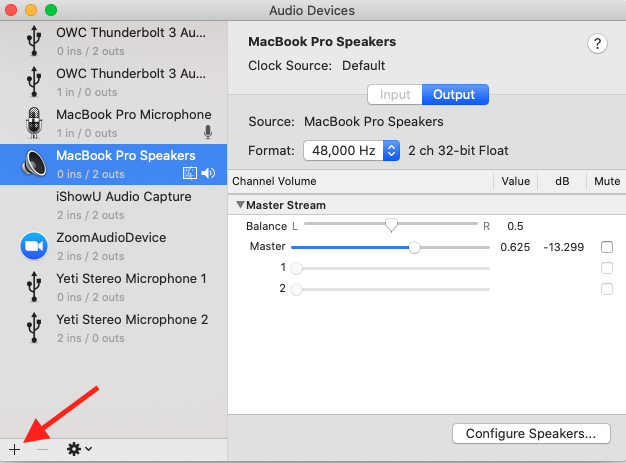
- You will be presented with another dialog box that looks something like below, note the arrows and run through the steps after the picture
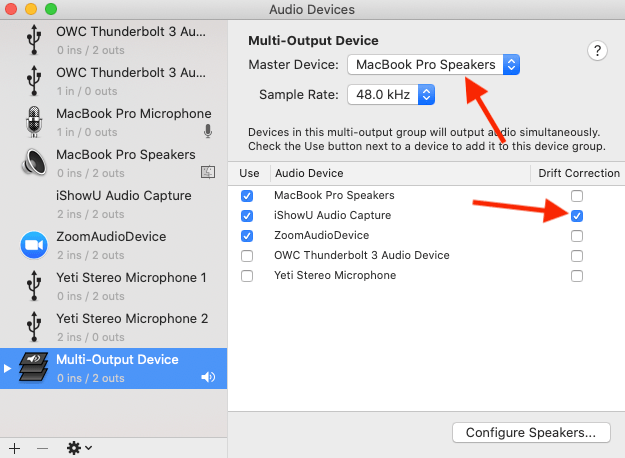
- Click the “master device” dropdown in the top center of the dialog and select “iShowU Audio Capture”
- Select “iShowU Audio Capture” as one of the audio devices
- Select any other appropriate output devices from this list for your setup, they will be your “pass through” so you can hear what OBS is capturing.
Note: If you are planning on using a bluetooth headset and you are planning on using its built in microphone read the “known problems” section- Uncheck “Drift Correction” for all devices if selected
- (Optional) Click on the “Multi-Output Device” label in the device’s list on the left hand side of the dialog box and give it something more memorable I used: OBS Audio Capture
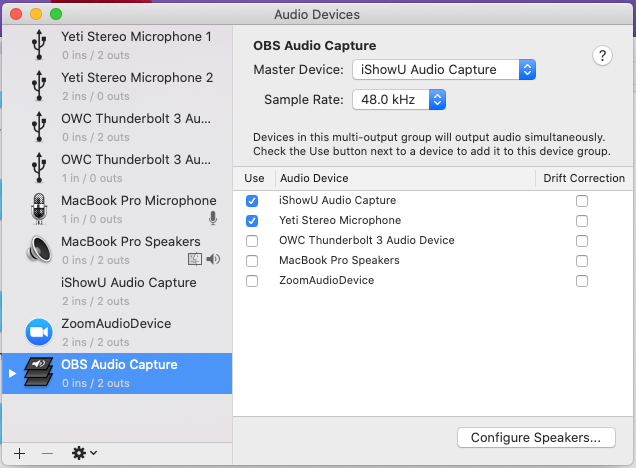
- Once you have run through the above steps your screen should look something like this:
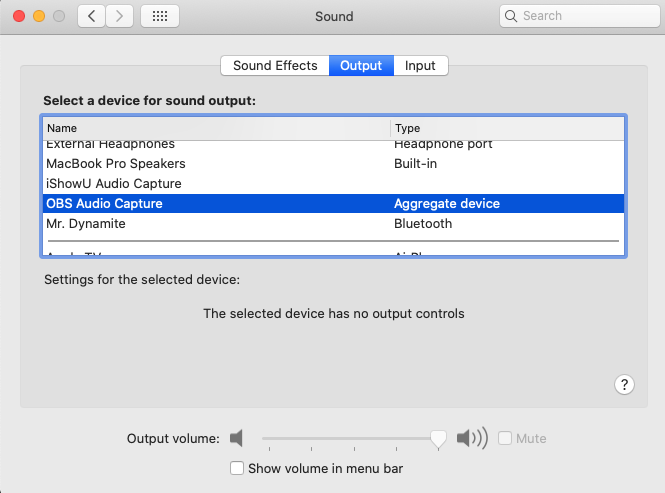
- Hit “command + space” to bring up spotlight and search for “Sound”
- Click “Output”
- Select the Multi-Output Device we just created (i.e. “OBS Audio Capture”):
Configure OBS to Capture Desktop Audio
We will now need to go into OBS to configure it to use the audio device we just setup to capture audio. With OBS open run through the following steps:
- Click on “Settings” in the lower left hand side of the screen
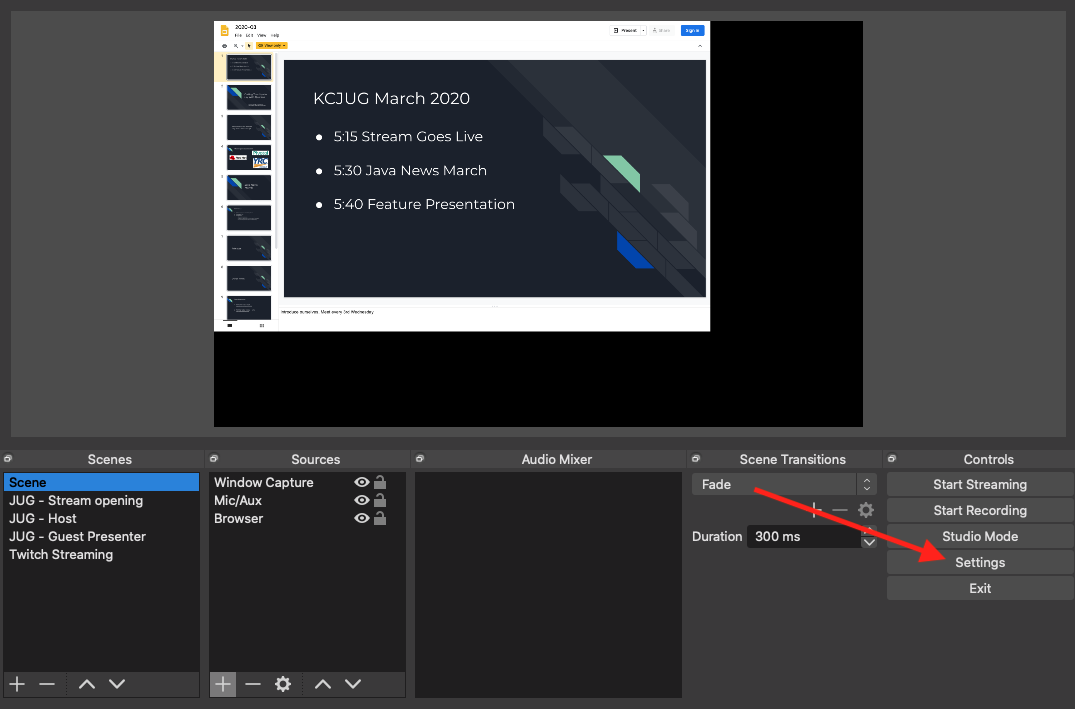
- Click on Audio in the dialog pop-up
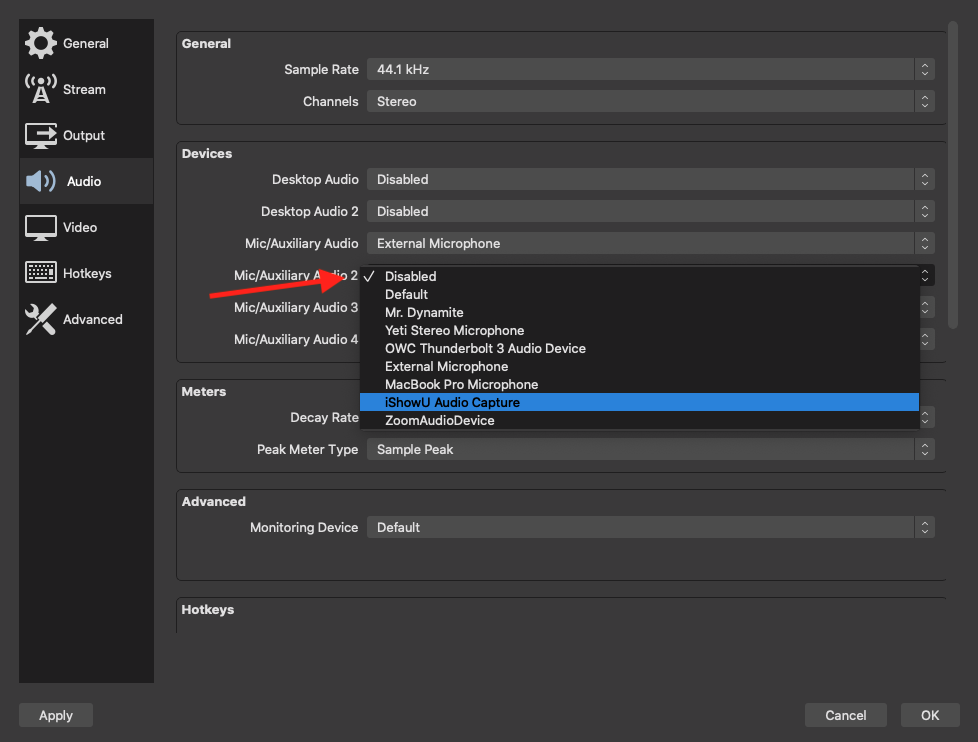
- Click on the dropdown for Mic/Auxiliary Audio 2 (or some other free option) and selection “IShowU Audio Capture”
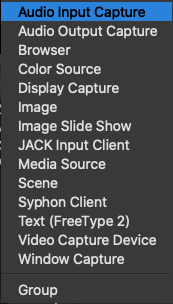
- Click the “+” button under sources for a scene
- Select “Audio Input Capture”
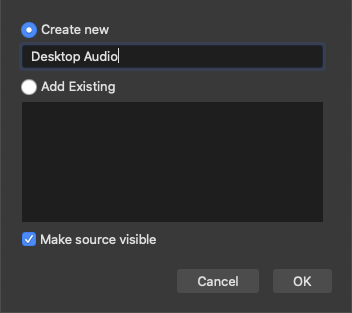
- Give a descriptive name for the audio source (e.g. “Desktop Audio”)
- Select “iShowU Audio” as the device
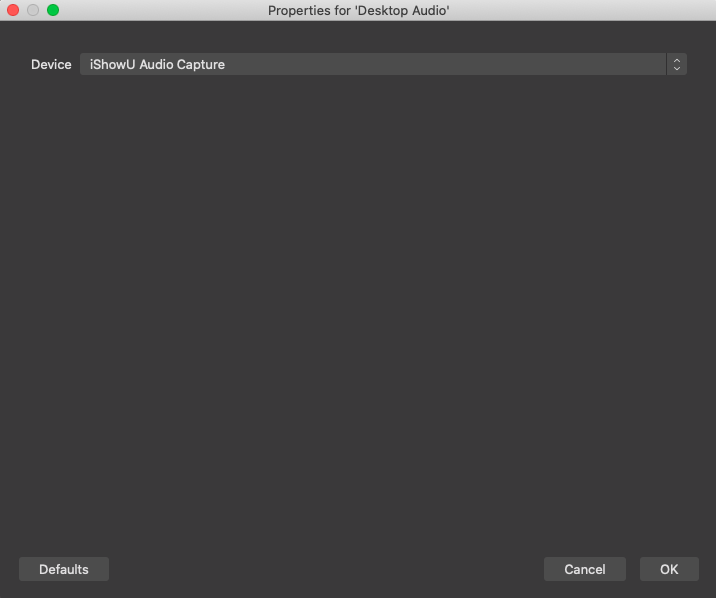
- You should now be capturing desktop audio, try playing a video or music to make sure sound is being captured (the sound bar should move)
Note: See below if you are not hearing any sound, if nothing is being captured run through the previous two sections again to make sure you did everything right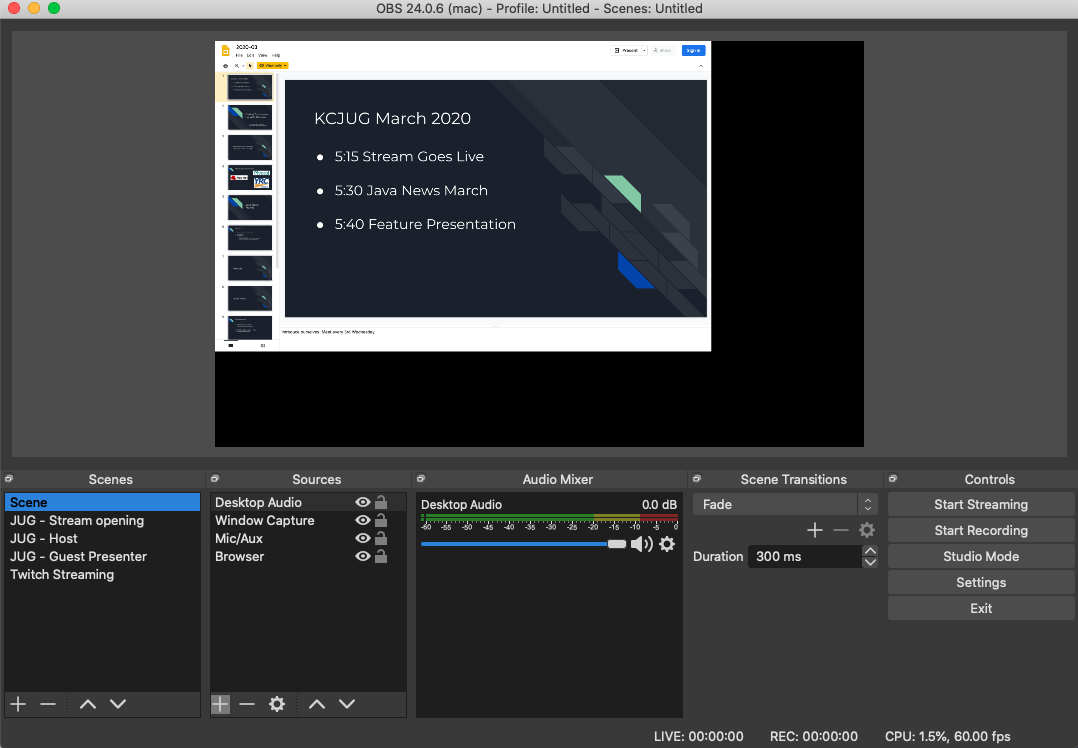
Configure Zoom to Allow OBS to Capture Its Audio
You will need to do a couple of steps to capture audio from a zoom call. If you haven’t already start Zoom.
- Make sure Zoom is your active program and open it’s preferences, top left of the desktop

- Select audio on the right side of the dialog box
- Open the speaker dialog box and select the multi-output device created earlier (e.g. OBS Audio Capture)
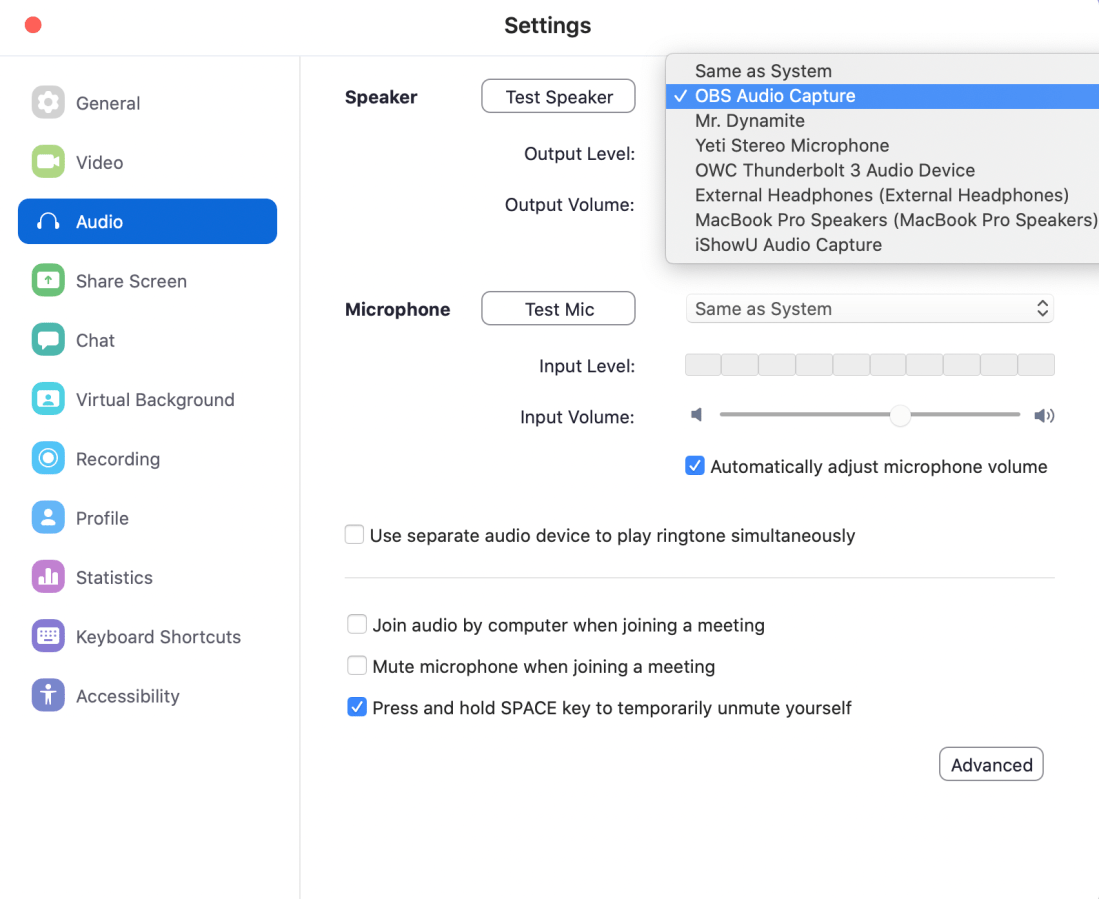
- Click “Test Speaker” and verify in OBS that audio is being captured
Known Problems
Below are some common problems/issues I have ran into:
- OBS is capturing audio, but I’m not hearing anything – If OBS is capturing audio, but you can’t hear anything coming from your computer one of a few things could be an issue
-
- Make sure the “pass through” audio device you configured during the “multi-output device” section is what you are using to listen to audio
- Make sure your computer output is going to the “multi-output device” you setup earlier (command + space and search for sound and select output)
- My computer audio is messed when not using OBS – When not using OBS, you probably want to use a different audio setup, e.g. using your computer’s speakers. Open up Sound in system preferences (Command + space) and under “output” select the preferred device for output
- Bluetooth headsets – Using the integrated microphone on bluetooth headsets seems to create a feedback loop. This won’t affect the audio being captured by OBS, but is distracting/disorientating.
Conclusion
Livestreaming is a new world for many as we deal with the ramifications of quarantines and social distancing brought on in response to COVID-19. Hopefully this guide addresses an issue I quickly ran into when trying to use OBS on macOS. Please leave a comment or reach out to me on twitter if you have any questions or feedback about this article.
Sources for configure IShowU Audio & Multi-Output Device: https://www.youtube.com/watch?v=y5O6ypLAH88
